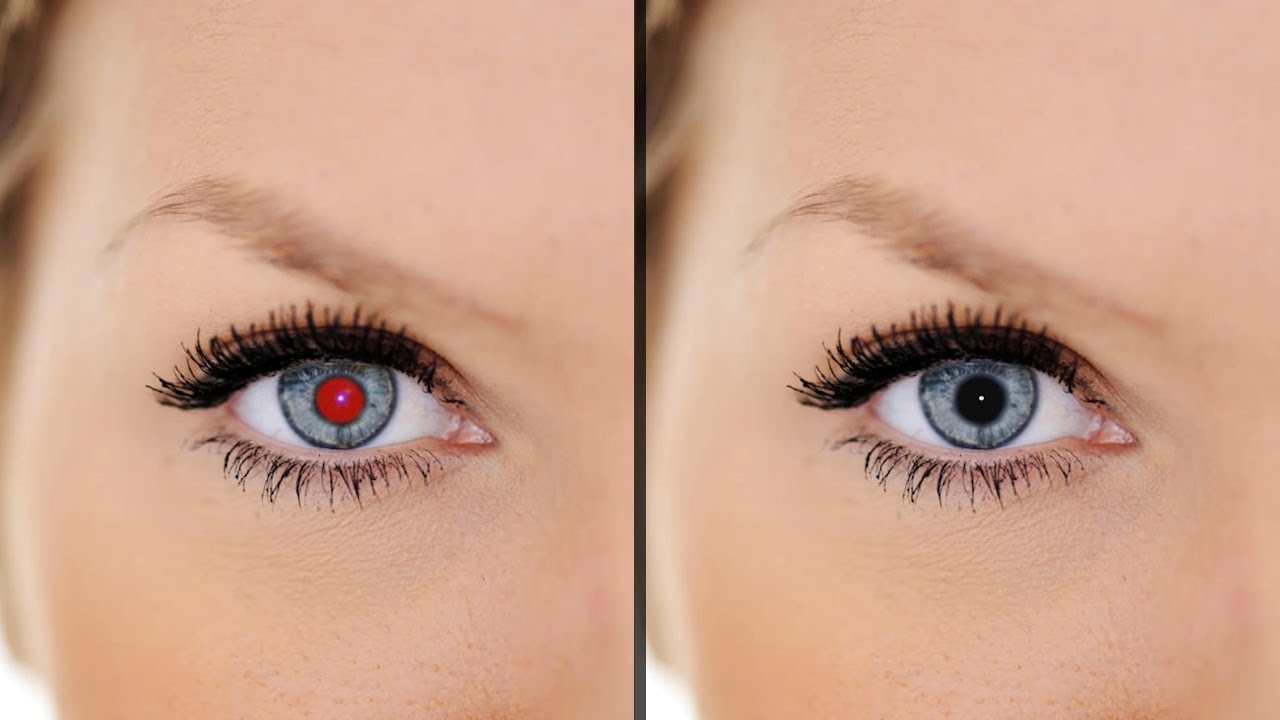
Photographs provide invaluable memories, and we’d want them to be as picture-perfect as possible. Unfortunately, something as small as reoccurring ‘red eyes’ in photos can hamper their appeal. While this phenomenon tends to plague those with lighter eyes, particularly when flash photography is involved, it also significantly affects individuals with darker eyes across various scenarios. Thankfully, the powerful image editing software GIMP allows several ways to correct this issue.
What Is The Redeye
Before we delve into the solutions, it’s vital to understand the ‘red-eye’ phenomenon. In essence, red eyes in photos result from light reflecting off the retinas in people’s eyes, particularly noticeable in low light situations when the pupils are more dilated.
Amending Redeye in GIMP: Automatic Vs. Manual
There are countless ways to address the ‘red eye’ conundrum within GIMP, with varying levels of automation. Whether you opt for a more manual approach or prefer something more automated largely depends on the specific needs of your project and your comfort level with the software.
As we explore these solutions, it’s crucial to remember not to resort to using the Circle or Ellipse Tools or any other pre-set shape tool for this purpose. Why so? The human eye is unique and precise, not easily captured by standard geometric shapes.
A Comprehensive Guide to the Automatic Redeye Removal Tool in GIMP
The phenomenon of ‘red eyes’ in photographs is one that plagues many, regardless of eye color or lighting situation. GIMP, a powerful image editing software, offers both automated and manual solutions to this common problem. This guide will focus on using the automatic redeye removal tool within GIMP, how to optimize its use, and its limitations.
Preparing to Use the Automatic Redeye Removal Tool
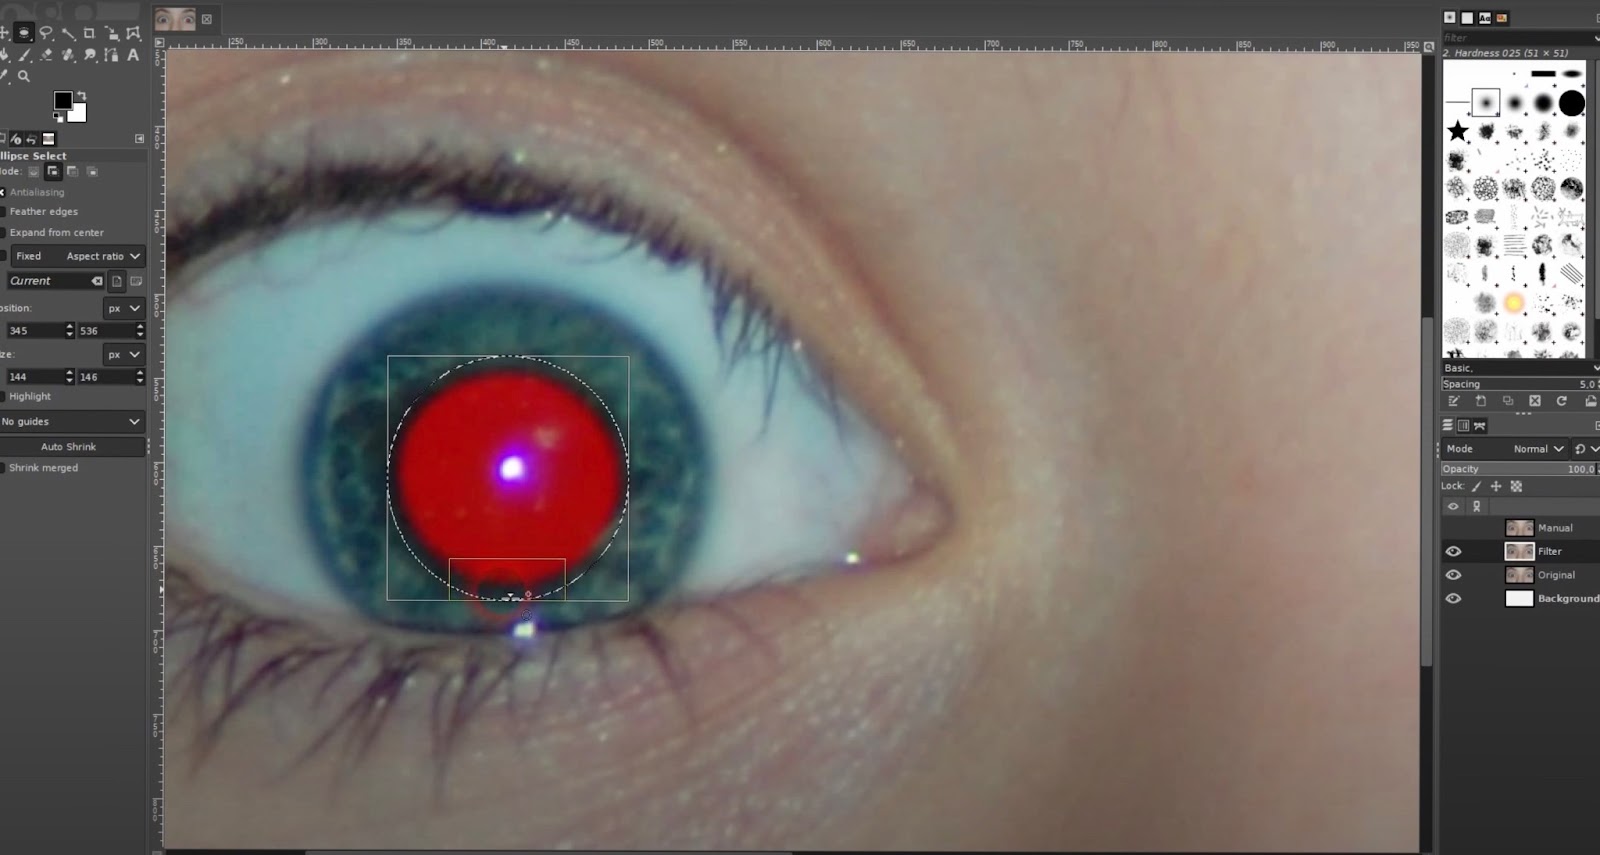
Before employing GIMP’s automatic redeye removal tool, we first need to isolate the area that requires fixing. The Free Select Tool is ideal for this task. Here’s how:
- Open the image in GIMP;
- Select the Free Select Tool from the Toolbox;
- Carefully outline the affected eye area with the Free Select Tool.
- To remove areas from your selection, use the CTRL + Click function;
- To add areas to your selection, use SHIFT + Click.
Imagine we have an image of a child with an overexposed eye, a casualty of a camera flash. The step-by-step process would involve selecting the affected eye using the method above.
Pros and Cons of the Automatic Redeye Removal Tool
Now, let’s discuss the automatic redeye removal tool itself. While convenient, this tool does often fall short of expectations.
To use the automatic redeye removal tool, follow these steps:
- With the eye area selected, locate and click on ‘Enhance -> Red Eye Removal’ in the Filters Menu;
- Accept the default settings and observe the result.
In many cases, you will notice that the eye appears significantly greyer post-edit. This outcome is less than ideal, especially if the subject does not possess grey eyes. To rectify this, you could employ additional color correction filters. For example, if the subject has brown eyes, you can use the Curves Tool in the Colors Menu to replicate the accurate eye color.
This further process involves adjusting each color channel (red, green, blue) to yield the desired eye color. However, this process is far from automatic and requires a certain level of skill and understanding of color balances.
While this process will successfully eliminate the red eyes, it does come with some setbacks:
- The edges of the eyes may appear darker and sharper compared to the rest of the image;
- The process does not address other photograph issues such as washed out facial features due to the camera flash or harsh shadows in the background.
Perfecting Manual Redeye Removal in GIMP
Many professionals often prefer a hands-on approach to phot editing, and redeye removal is no exception. Manual methods offer greater control over the end result, and while they may seem daunting at first, they’re as straightforward as using automated tools. Additionally, manual methods can address other picture quality issues, not just redeye. Here’s a step-by-step guide to manual redeye removal in GIMP that also enhances overall image quality.
Step 1: Enhancing Image Quality
To begin, utilize filters on the entire photo, not just the eyes, to enhance the image quality. Follow these steps:
- Choose the ‘Brightness-Contrast Tool’ in the Colors menu;
- Lower the brightness by 15 points and increase the contrast by the same amount;
- Use the ‘Hue-Saturation Tool’ to boost color saturation by 15 points.
Now, your image will have deeper contrasts and more vibrant colors.
Step 2: Eliminating Undesirable Shadows
GIMP allows you to remove distracting shadows or backgrounds. To eliminate a prominent shadow in the image follow these steps:
- Select the ‘Free Select Tool’ from the toolbox;
- Carefully outline the shadow you wish to remove;
- Choose the ‘Clone Tool’ and select an area of the background that matches the texture you want;
- Apply the clone tool over the selected shadow.
Step 3: Manual Redeye Removal
With the overall image quality enhanced and unwanted shadows removed, let’s focus on the redeye now:
- Use the ‘Free Select Tool’ to outline the eyes;
- Open the ‘Hue-Saturation Tool’ and reduce the saturation to 100% and lightness to 74.7%.
This process neutralizes the intense red color, providing you with a clean slate to recreate the eye color.
Step 4: Restoring Eye Color
To restore the eye color, you will use the ‘Curves Tool’. Lowering the red, green, and blue channels in a staggered manner will create a rich brown color. This step helps you bring the eyes back to life with their actual color, making them look more realistic and vibrant.
Step 5: Highlighting the Eyes
Lastly, to make the eyes pop, increase the brightness on the eye highlights by 50 points.
This manual process pays off with a significantly improved end result, delivering a perfected image free from the harsh red eyes while enhancing the overall picture quality.
Show the GRUB Boot Menu in Linux Mint at Startup
Now, let’s shift our focus to managing your Linux Mint boot menu, specifically how to show the GRUB boot menu at startup. This can be useful for dual-booting or accessing advanced boot options.
- To display the GRUB boot menu in Linux Mint, you’ll need to edit the GRUB configuration file. Open a terminal and enter the following command to edit the file:

- Find the line that reads GRUB_TIMEOUT=0 and change the 0 to the number of seconds you want the menu to be displayed. For example, if you want a 10-second delay, change it to GRUB_TIMEOUT=10;
- Save the file and exit the text editor;
- Finally, update GRUB by running the following command:

Now, when you restart your Linux Mint system, the GRUB boot menu will be shown, allowing you to choose your preferred boot option or access advanced settings.
Wrapping It Up
GIMP stands as a versatile and user-friendly software, empowering photographers and casual users alike to rectify the common ‘red eye’ problem and further touch up their images. With an array of tools at your fingertips, you can do more than just redeye removal – you can adjust brightness, boost saturation, soften shadows, and so much more. So, whether you’re a professional photographer or a hobbyist, mastering GIMP will pave your way to consistently delivering stunning, high-quality photographs.